How to brighten a dark subject without overexposing the background?
October 14, 2026
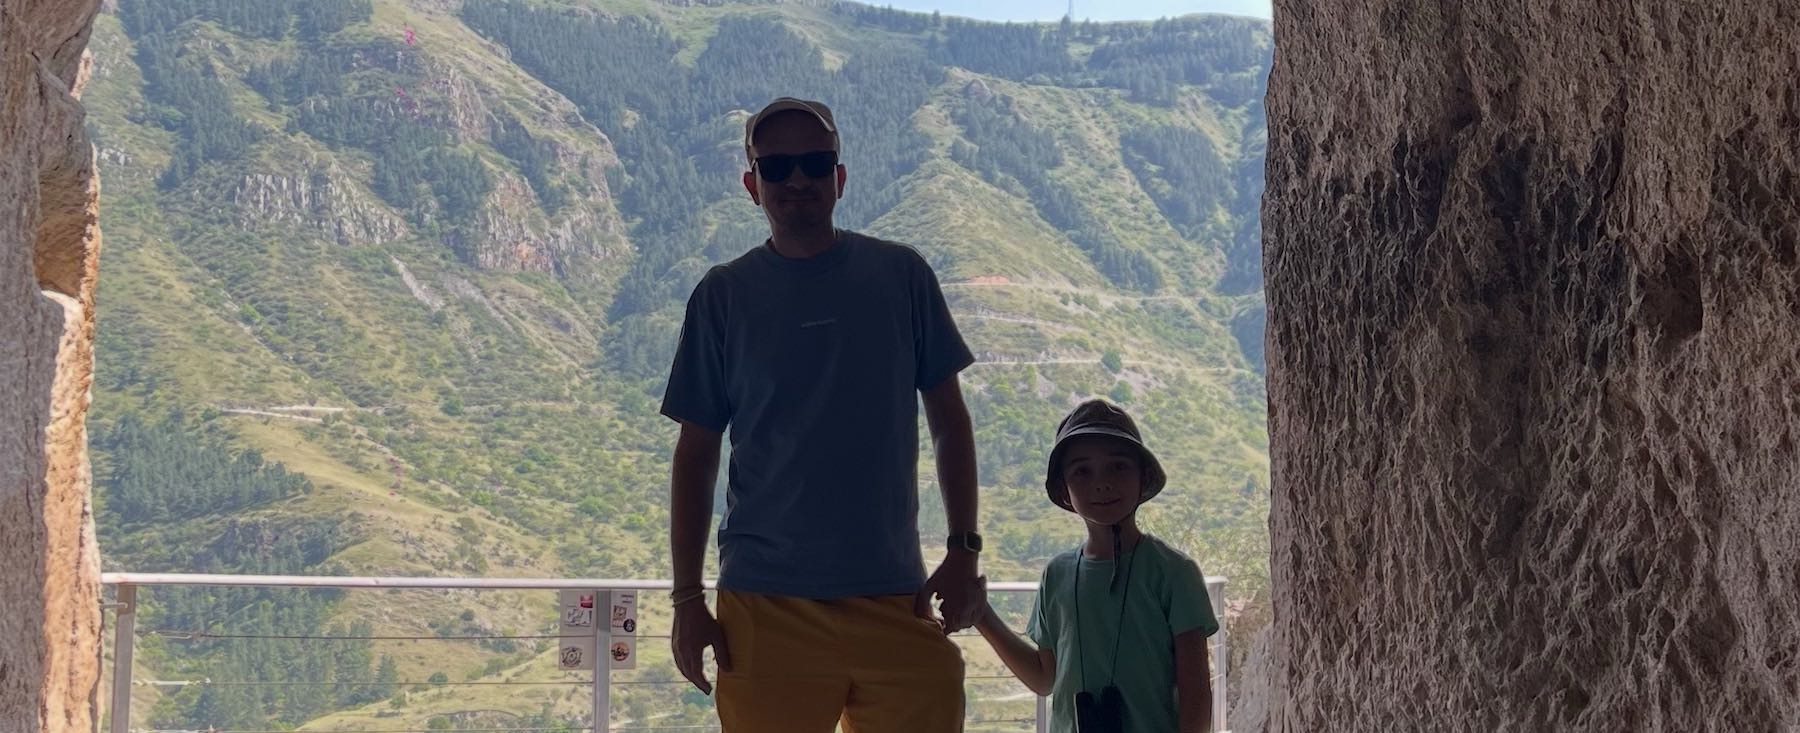
Have you ever taken a photo where the background looks perfect, but the person in front of it is too dark? This is a common problem in backlit photography. It often happens when you photograph someone against a bright sky, a sunlit landscape, or a window.
The challenge is to brighten the subject while preserving the details, colors, and atmosphere of the background. Increasing the exposure of the entire image can make the background too bright, so the trick is to adjust different parts of the photo independently.
In this tutorial, we'll explore two ways to fix a dark subject in Pixea: depth-aware adjustments and masks.
Method 1: Use depth-aware adjustments
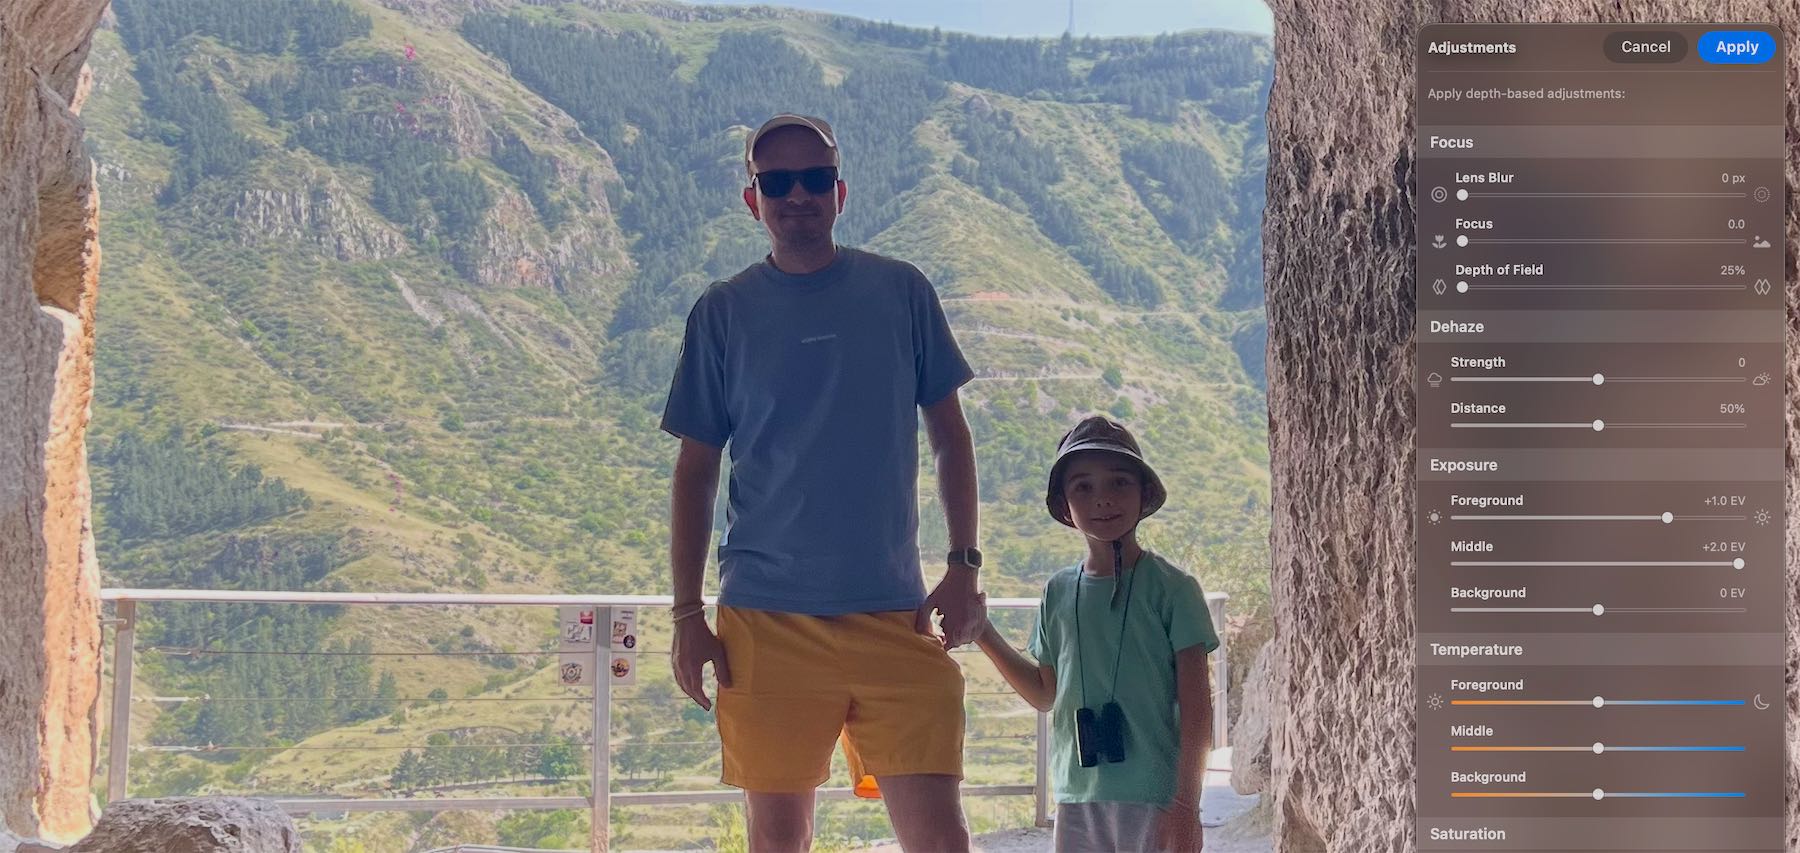
Depth-aware adjustments let you edit different parts of an image according to their distance from the camera. Instead of selecting the subject manually, Pixea uses an AI-generated depth map to distinguish the foreground, middle ground, and background.
This is particularly useful for outdoor portraits and travel photos, where you want to brighten people without changing the surrounding scenery.
Step 1. Open Depth-based Adjustments.
Open your photo in Pixea and choose Edit → Depth-based Adjustments.
Step 2. Brighten the foreground and middle ground.
Increase the Exposure value for the Foreground and, if necessary, the Middle region. In our example, both regions receive a +2 EV adjustment, while the Background remains unchanged.
This brings out details in the people while preserving the brightness of the sky and landscape.
Step 3. Fine-tune the result.
Every photo is different, so adjust the exposure until the subject looks natural. You can also fine-tune Shadows, Temperature, Saturation, Brilliance, and Vibrance independently for each depth region.
Depth-aware adjustments are a great starting point when the subject is clearly separated from the background. However, depth estimation isn't always perfect, particularly around fine details or overlapping objects. If you need more precise control, try masks instead.
Method 2: Brighten the subject with masks
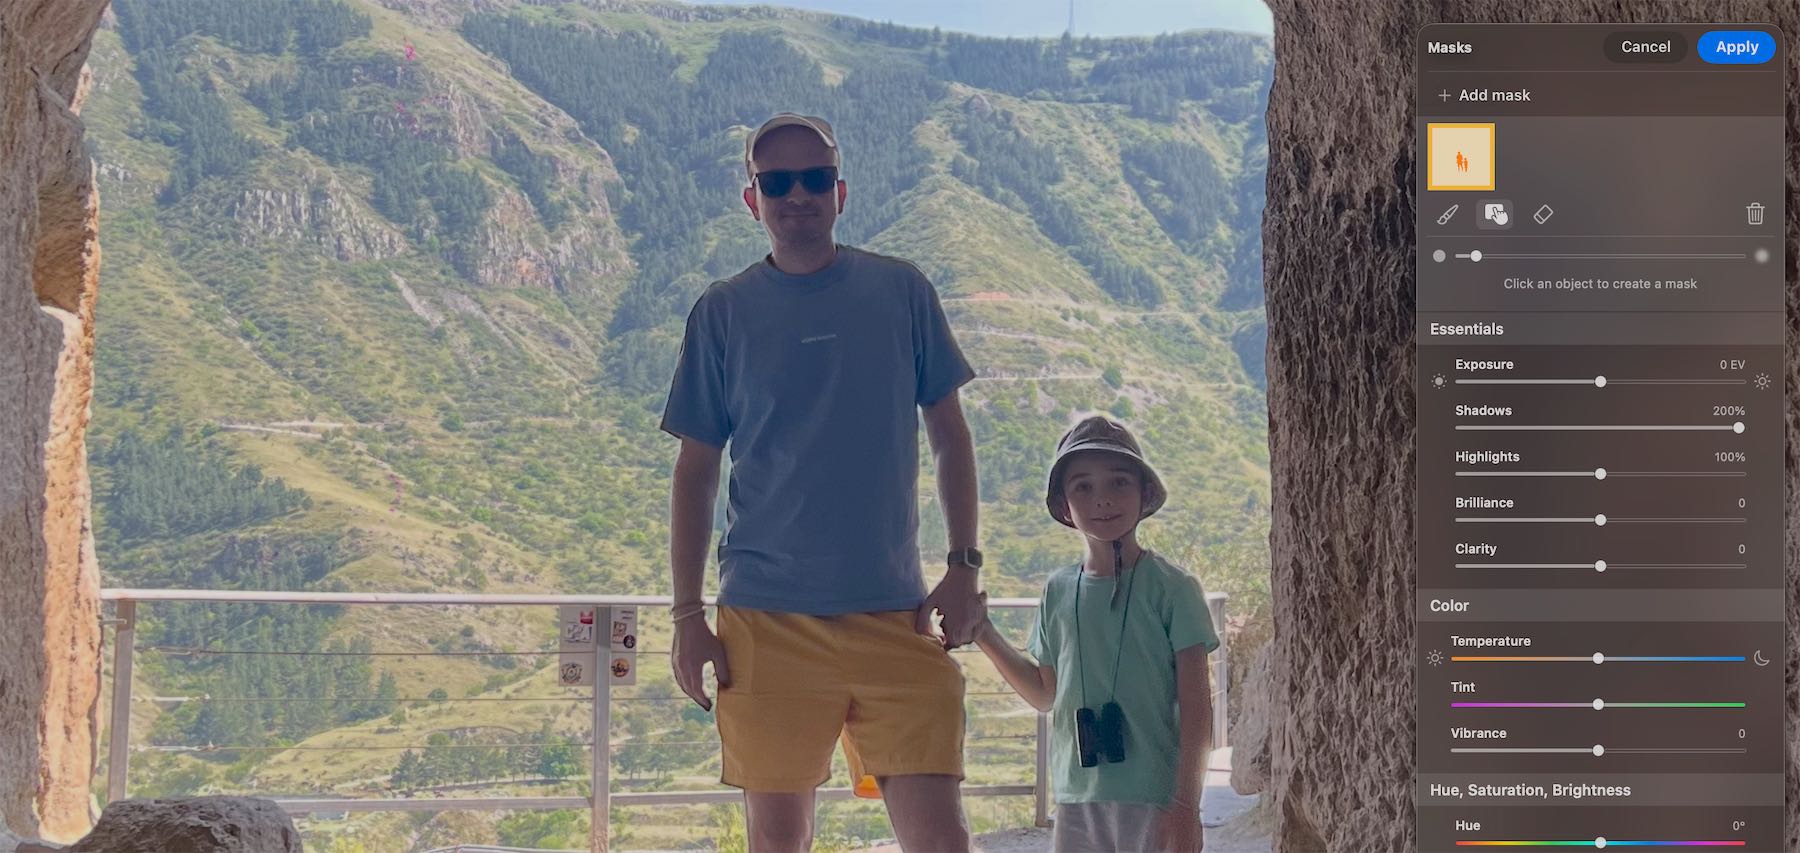
Masks let you apply adjustments to a specific object or area of a photo without affecting everything around it. This is ideal when you want to brighten a person's face, clothing, or entire figure while keeping the background intact.
Step 1. Open Masks.
Choose Edit → Masks to open the masking tools.
Step 2. Select the subject.
Use Pixea's point-to-click masking tool and click the person you want to brighten. Pixea creates a mask for the selected object, allowing you to edit it separately from the rest of the image.
Step 3. Recover details in the shadows.
Increase Shadows to reveal details in dark clothing and faces. If the subject is still too dark, raise Exposure slightly as well.
In our example, increasing Shadows helps recover detail in the subjects while preserving the original background. You can also adjust Temperature, Vibrance, and other color settings to make the result look more natural.
Step 4. Refine the mask if needed.
Inspect the edges around the subject, especially near hair, hands, and clothing. If the selection needs improvement, refine the mask with the available masking tools before applying the adjustments.
Which method should you use?
Both approaches can produce natural-looking results, but they work best in different situations.
- Depth-aware adjustments are ideal when you want to brighten the foreground or adjust several depth regions at once.
- Masks are better when you need precise control over a particular person or object, regardless of its depth.
You can also combine both methods: use depth-aware adjustments for the overall lighting balance, then apply a mask to fine-tune the subject.
The goal isn't simply to make a dark subject brighter. It's to restore the details that matter while preserving the natural balance of the entire photograph.

Modern Image Editor and Viewer